
The 2014 Seamingly Smitten Summer Pattern Tour is underway! Keep reading for your chance to enter the Rafflecopter Giveaway and a Coupon Code to the Etsy Shop.

Its Day 2 and I'm taking a look at the Sunny Halter Top for Women. This pattern was released in 2012 and I asked to give it a try, opting to bring back an "oldie but a goodie" for the tour.


The Sunny Halter Top is, as your sewing magic allows, a versatile pattern. You can make a pillow case style dress/shirt to coordinate with your daughters; a halter top/tunic or dress with or without a bow; a nightgown or "around the house" day gown; a lunch with friends outfit (I made that!) and, the elastic casing can be placed wherever you'd like as well! Next one I make will have a tie inside of the casing instead of elastic. I think that'd be cute!
I started out with a yard and a half of an embroidered batik (found in my stash -- another clearance table find at Hancock Fabrics about 4 years ago . . . it got lost in the closet).
I started to cut out my size top then decided to just go with the entire length of the fabric I had and see what happens . . .

I decided to make a day dress! I love the bow at the front side! You can tie your straps into a bow or not, at front, back or even in the middle of the top casing . . . that's up to you.
I used single fold bias tape on the armscye, opting to not press it in just yet -- I wanted to wait until I completed the casing and then sew up the side left open as per the instructions.
I drew the horizontal line for the casing inside my dress and proceeded to stitch it in place. This is a chance for you to move that needle if you haven't already tried it yet!
Use your presser foot to help stabilize the bias tape on your dress/top. Move your needle to the furthest point allowed on the side closest to the edge of your bias tape. Stitch away!

Flip your garment around, and start sewing on the other side of the bias tape. You shouldn't have to move your needle this way.
Once your casing is in place, don't forget to move your needle back to its original position!
I love how this looks! I did cut this dress in a straight line instead of the slight grade in the pattern piece. Decided where I wanted the bottom hem to lay and . . . .

. . . added a big belt and voila! Its cute and comfy!
Now I wonder what it would look like in knit . . . . (searching enormous fabric hoard . . . . )

Found a cute cute pink & white knit. I had a yard. And, I decide that I want to have my elastic sit at the waist instead of the hip.
I measured up 4 more inches from the recommended casing placement. I took advantage of the stripes -- I simply marked the center point on the stripe that was to be my guideline, cut a piece of elastic at the measurement of my natural waist. After securing the elastic in a circle, and marking the quarter points, I pinned it to the inside of my halter.

I decided not to make a casing since the stripe would be a great guide as it was.
Stretched the elastic to fit, and stitched away.
I also cut a piece of FOE, put it through the top casing, and decided to cut it, stitch it together, and hide the seam. I don't have to tie anything! It sits around my shoulders perfectly!


A previous post in my blog HERE shows several other items I've made with Seamingly Smitten Patterns if you need some help deciding what patterns to choose! (and a couple how-to's)
Its Day 2 and I'm taking a look at the Sunny Halter Top for Women. This pattern was released in 2012 and I asked to give it a try, opting to bring back an "oldie but a goodie" for the tour.
Here's a few photos
of the Sunny Halter Top from the Etsy Shop:
And here's what I made using this pattern:
The Sunny Halter Top is, as your sewing magic allows, a versatile pattern. You can make a pillow case style dress/shirt to coordinate with your daughters; a halter top/tunic or dress with or without a bow; a nightgown or "around the house" day gown; a lunch with friends outfit (I made that!) and, the elastic casing can be placed wherever you'd like as well! Next one I make will have a tie inside of the casing instead of elastic. I think that'd be cute!
I started out with a yard and a half of an embroidered batik (found in my stash -- another clearance table find at Hancock Fabrics about 4 years ago . . . it got lost in the closet).
I started to cut out my size top then decided to just go with the entire length of the fabric I had and see what happens . . .
I decided to make a day dress! I love the bow at the front side! You can tie your straps into a bow or not, at front, back or even in the middle of the top casing . . . that's up to you.
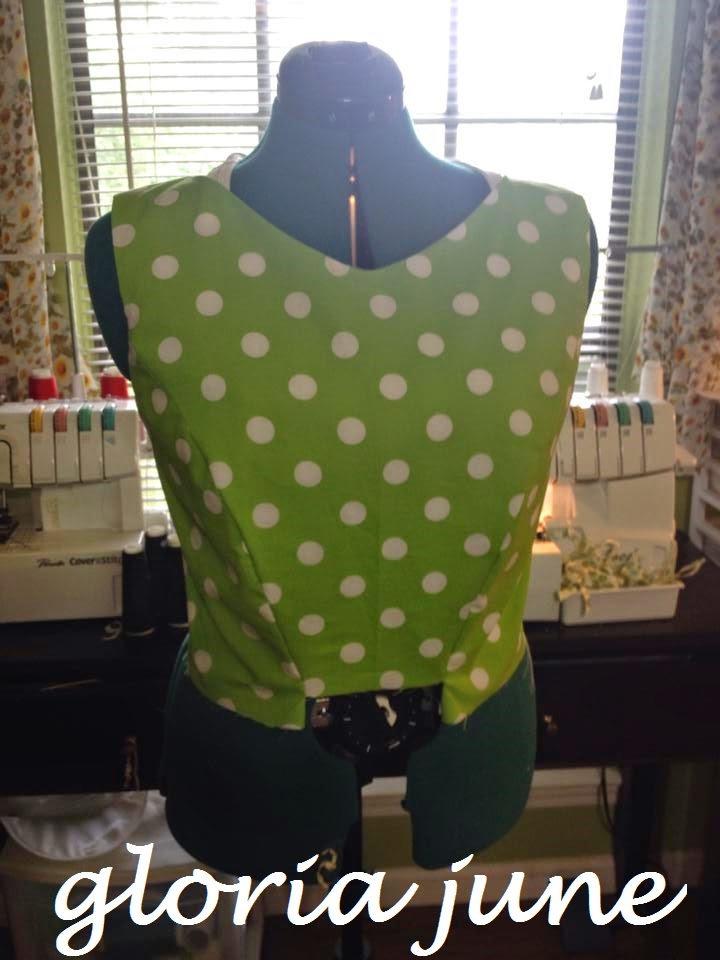
I used single fold bias tape on the armscye, opting to not press it in just yet -- I wanted to wait until I completed the casing and then sew up the side left open as per the instructions.
I drew the horizontal line for the casing inside my dress and proceeded to stitch it in place. This is a chance for you to move that needle if you haven't already tried it yet!
Use your presser foot to help stabilize the bias tape on your dress/top. Move your needle to the furthest point allowed on the side closest to the edge of your bias tape. Stitch away!
Flip your garment around, and start sewing on the other side of the bias tape. You shouldn't have to move your needle this way.
Once your casing is in place, don't forget to move your needle back to its original position!
I love how this looks! I did cut this dress in a straight line instead of the slight grade in the pattern piece. Decided where I wanted the bottom hem to lay and . . . .
. . . added a big belt and voila! Its cute and comfy!
Now I wonder what it would look like in knit . . . . (searching enormous fabric hoard . . . . )
Found a cute cute pink & white knit. I had a yard. And, I decide that I want to have my elastic sit at the waist instead of the hip.
I measured up 4 more inches from the recommended casing placement. I took advantage of the stripes -- I simply marked the center point on the stripe that was to be my guideline, cut a piece of elastic at the measurement of my natural waist. After securing the elastic in a circle, and marking the quarter points, I pinned it to the inside of my halter.
I decided not to make a casing since the stripe would be a great guide as it was.
margin-right: 1em;">
Stretched the elastic to fit, and stitched away.
I also cut a piece of FOE, put it through the top casing, and decided to cut it, stitch it together, and hide the seam. I don't have to tie anything! It sits around my shoulders perfectly!
 |
| And as always, the chickens have to sneak into the photos . . . :) |
And so I have another comfy shirt to wear this summer! I actually wore it the rest of the day to do yardwork. Super comfy and its my shirt the way I want it to be!
And just one more incentive for you . . . .
Football Season is fast approaching . . . .
Think of those matching game day dresses you can make!
 |
| GEAUX TIGERS! |
Make a Sunny Halter Top for you,
to match those pillow case dresses
you made for your daughter!
Here's a Coupon to help you start
sewing your summer wardrobe:
and the Etsy Shop link here.
A previous post in my blog HERE shows several other items I've made with Seamingly Smitten Patterns if you need some help deciding what patterns to choose! (and a couple how-to's)
Now hop on over to the other Bloggers on the Tour to view some more Seamingly Smitten Sewing Patterns for Summer!
Monday, July 21st - Jamie from Scattered Thoughts of a Crafty Mom
Tuesday, July 22nd - ME!!! and
Jenny from Uku Chic
Erin from Crafty Biggers
Wednesday, July 23rd - Jen from Eat Sleep Make
Emily from Lady and the Gents
Sabra from Sew a Straight Line
Thursday, July 24th - Lynn from Bebelambs
Ula from Lulu and Celeste
Friday, July 25th - Rebecca from Our Busy Little Bunch
Jessica from Snickerdoodle Stew
Enter the Giveaway below for your chance to win
5 Seamingly Smitten Sewing Patterns of choice (a $40 value)
Winners will be announced Saturday July 26th on the
and via Email.
Good Luck y'all!
Happy Sewing,
gloria june


